System Center
How to Invoke Web Services from Microsoft System Center Orchestrator 2012?
In this blog we are going to describe How to Call Web Service from System Center Orchestartor 2012, using the Invoke Webservices Activity

- We will elect a certain Webservice for test: http://www.ezzylearning.com/services/CountryInformationService.asmx
- Navigate to the URL to be sure it is working fine.
Note : If you find this WebServices retired; please add your own or add a new one
Example : http://www.webservicex.net/CurrencyConvertor.asmx?WSDL
All next steps should be the same - Now we need to get the WSDL file from this webservice, so, either to click on the Service Description link or Navigate directly to
http://www.ezzylearning.com/services/CountryInformationService.asmx?WSDL

- Save this page to your hard drive

- It is time now to call it from Orchestrator, In your runbook, Drag-Drop the Invoke Web Service Activity from the Utilities.

- Set the properties of the Activity as follow:
WSDL: Write the Path of the wsdl file that you have just save.
Method: Select the required Web method, in this example we will use GetContients.
Format Hint: it is Optional, sometimes it gives a result when you click it, depending on the web method it self, in our case, no Fomrat Hint is avaliable.
- On the Advanced Tab, Check on the Address URL, and write the webservice full URL, http://www.ezzylearning.com/services/CountryInformationService.asmx

- In the Security Tab, if the webservice have a HTTP Authentication, write it, other wise, leave it as it is, in our case, we will leave it as it is.

- Add the activity of Append Line as shown, as we are going to display some output there

- configure the Append line as shown.

- Run your Runbook


You can parse the XML Response by Powershell script, or any other language to get your needed data.
Regards,
How to Change the Orchestrator Database ?
You might have to change the location of the Orchestrator database after installation, because you might want to separate the management server and database server, move the database to a larger server or a cluster, or just reconfigure the orchestration database based on required changes in your environment. You can use standard Microsoft SQL Server methods to move the existing database to another server, but then you must configure the Orchestrator features to connect to the new server. You must perform this configuration for the management server, the web service supporting the Orchestration console, and each runbook server as described in the following procedures.
Management server and runbook servers
To change the database settings for the management server and runbook servers.
- On the management server, click Start, point to All Programs, click Microsoft System Center 2012, click Orchestrator, and then click Data Store Configuration.
- In the Server box, enter the name of the server that is hosting the database by using the format \,. You can click the ellipsis (…) button to select the computer. You do not have to include the instance if the Orchestrator database is installed on the default instance. You do not have to include the port if SQL Server is usually installed on the default port 1433.
If the Orchestrator database is installed on an instance called MyInstance on a computer named MySQLServer that is configured on port 12345, enter MySQLServer\MyInstance,12345.
If the Orchestrator database is installed on an instance called MyInstance on a computer named MySQLServer that is configured on port 1433, enter MySQLServer\MyInstance.
If the orchestration database is installed on the default instance on a computer named MySQLServer that is configured on port 1433, enter MySQLServer. - Select the authentication method to use to connect to the SQL Server:
– Windows Authentication Connect to the SQL Server by using Windows Authentication.
– SQL Server Authentication Connect to the SQL Server by using a SQL Server user account. Type the User Name and Password of the SQL Server user account. This account must have rights to create, write, and own a database and create, update, and delete rows in the database. - Click Next.
- In the Data Store pane, click Use an existing database.
- In the Name list, select the databases.
- Click Finish.
Web Service
The web service supporting the Orchestration console does not use the Settings.dat file. To change the database settings for the web service, you must modify the Web.config file on the Internet Information Services (IIS) server. You can use IIS Manager to modify the file, but you must first decrypt it by running the aspnet_regiis.exe executable file.
To change the database settings for the Orchestrator web service
- Log on with administrative credentials to the computer with the Orchestration console installed.
- Open a Command Prompt window with administrator credentials.
- Run the following command to decrypt the Web.config file:
C:\Windows\Microsoft.NET\Framework\v4.0.30319\aspnet_regiis.exe -pdf “connectionStrings” “C:\Program Files (x86)\Microsoft System Center 2012\Orchestrator\Web Service” - To start the IIS Manager, click Start, point to Administrative Tools, and then click Internet Information Services (IIS) Manager.
- Expand the Sites node, and then click Microsoft System Center 2012 Orchestrator Web Service.
- In the Features View, double-click Connection Strings.
- In the Connections String pane, double-click OrchestratorContext.
- In the Custom box, scroll down to the portion of the string that includes the server name (Data Source) and database name (Initial Catalog). Modify these values as required.
- Click OK to close the dialog box.
- Close IIS Manager.
- Run the following command to encrypt the Web.config file:
C:\Windows\Microsoft.NET\Framework\v4.0.30319\aspnet_regiis.exe -pef “connectionStrings” “C:\Program Files (x86)\Microsoft System Center 2012\Orchestrator\Web Service”
Reference: Microsoft document for Administering Orchestrator in System Center 2010 Service Pack 1
Build Your First Orchestrator Runbook
In this article we will intorduce how to build your first runbook using System Center Orchestrator 2012
- From the Start Menu, Select Runbook Designer

- If there is no New Runbook Area, Right-Click on the Runbook folder, and Select New Runbook
‘

- On the New Runbook Area, We will drag and drop some Activities from the Activities List on the right pane.
‘

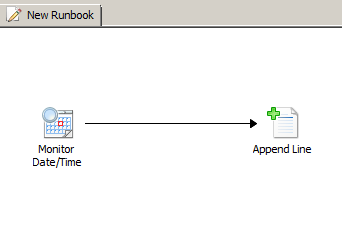
- From the Scheduling tab, select Monitor Date/Time activity, and from Text File Management Tab, select the Append line activity, draw a link between the both activities.

- Now, we need to configure the properties of both activities, Right-Click on Monitor Date/Time Activity to set its Properties.

- We will set the Monitor Date/time to fire every 5 seconds

- For the Append Line Activity, Right-Click on it to set its properties.
- Set it as exists below, for the Text, we can add any static value, but to make the sample some more reasonable, We will add a dynamic variable, so, Right-Click on the Text box, and Select Subscribe > Published Data > Activity Start Time in UTC

- Now our runbook is ready for Run, Click Check In from the top bar.

- Note that the Run button is Activated, Click on it.
- Check the Out-put file, it should be something like this, Good Luck !